How to Connect Squarespace Order Webhooks using Make.com
Automating Squarespace Orders in Make.com Without Intervals
In this tutorial, you’ll learn how to set up a webhook subscription for Squarespace orders on Make.com. This method avoids relying on intervals, which can consume a lot of operations and ensures that your automations are triggered immediately when an order is placed.
You can download the blueprints for a quick setup and follow along the instructions:

Tutorial
Step 1: Create a Webhook Trigger
1.1: Create a Scenario
In Make.com, create a new scenario and name it something like “SQS Orders“.
Add the Webhook app, then select Custom Webhook from the list of available options.
If you’ve downloaded the blueprint, create a new scenario and import the “SQS Orders” JSON file.
1.2: Add a Webhook Connection
Inside the Webhook module, click ADD to create a new webhook connection.
Name the webhook connection something recognizable, like Website Orders, and save it.
1.3: Copy the Webhook URL
After saving, Make.com will generate a unique Webhook URL for you.
Copy this Webhook URL.
Emoji_objectsTo keep things smooth and efficient, I recommend using my favorite copy-to-clipboard extension, Maccy.
1.4: Save the Scenario
Save the scenario with the webhook module active so you can view test data as it arrives and properly set up the data structure. A red button should have a loading circle that says “STOP.” If the button is purple and says “Redetermine data structure,” then click it to let the module listen for data.
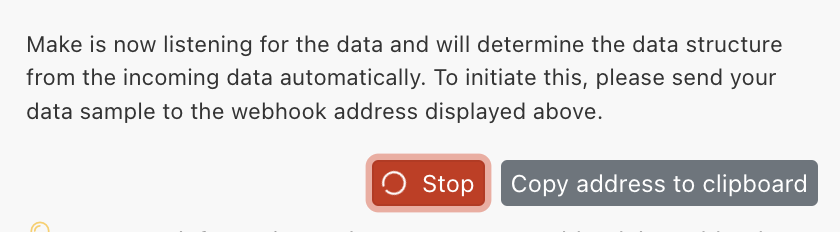
Keep this open for the next step and leave the stop button on.
Step 2: Create a New Scenario to Subscribe to Squarespace Orders
In a new tab, create another scenario. This is where we’ll subscribe to Squarespace order webhooks directly. You can name it something like “Subscribe to SQS Orders“
If you’ve downloaded the blueprint, import the “SQS Webhook Subscription“ JSON file in a new scenario and skip to 2.2.
2.1: Add a Squarespace Module
Add the Squarespace module to the scenario.
Select Make an API Call from the module options and connect your account.
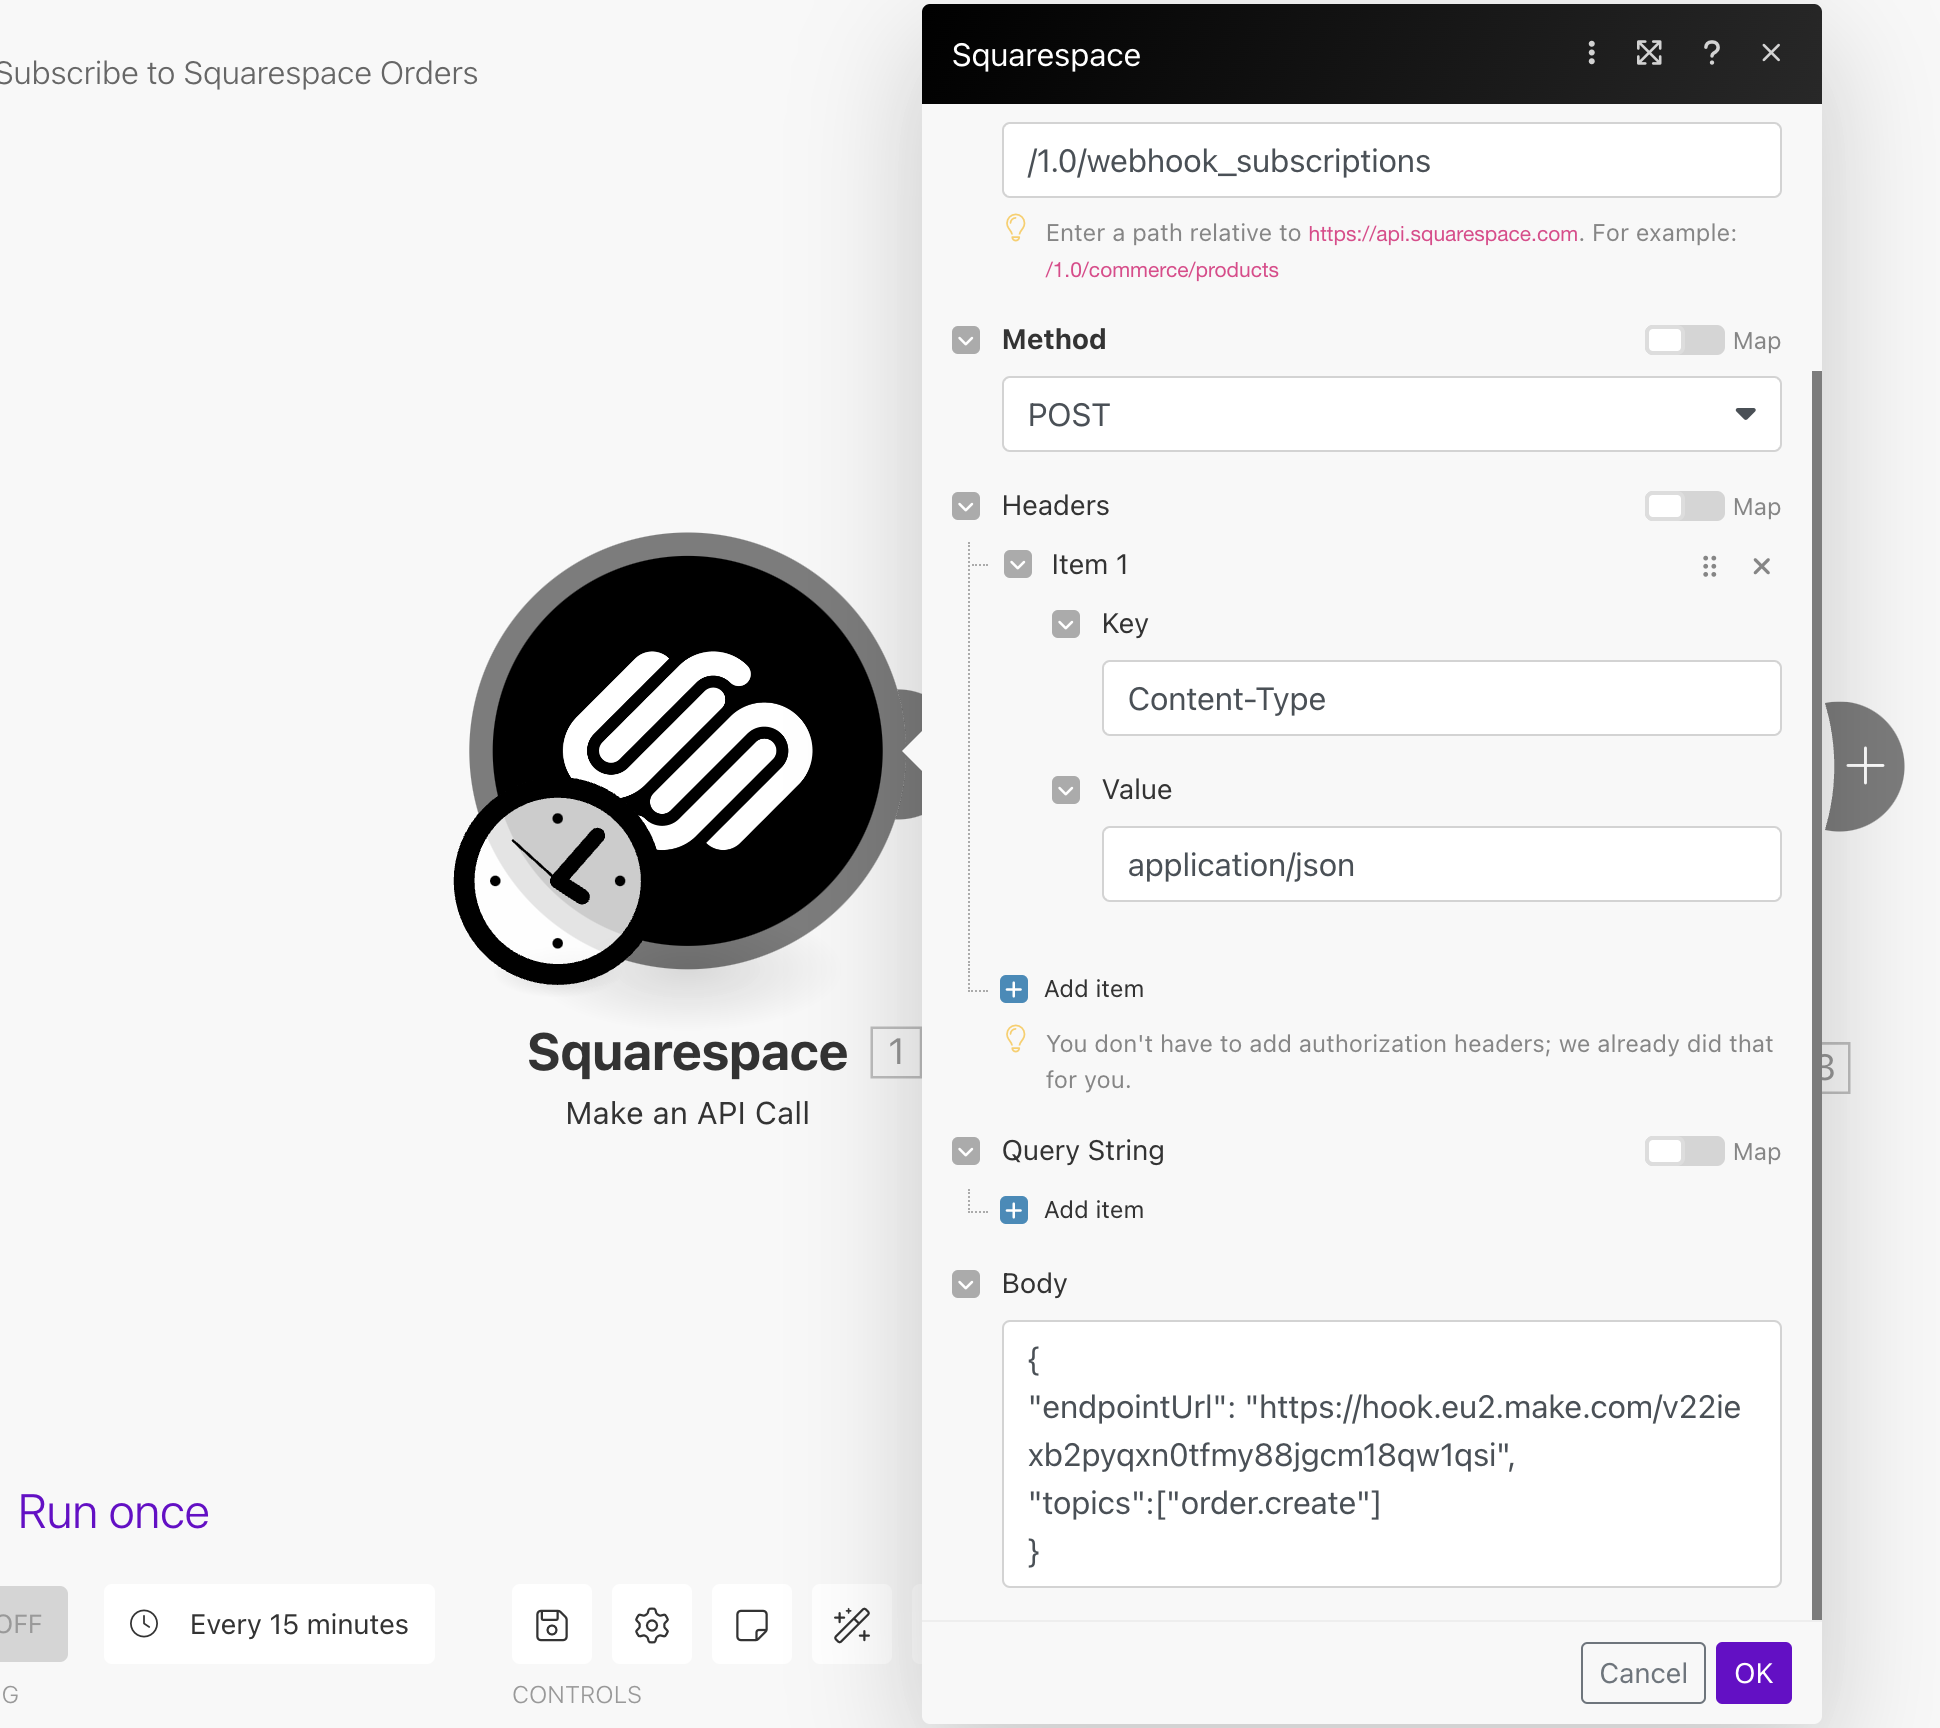
2.2: Set API Call Details
Select the module to open the configuration
Set the API call details as follows:
/1.0/webhook_subscriptions
Method: POST
Headers: Add the following key-value pair.
key:Content-Typevalue:application/json
Body: Copy the code below and replace the {{webhook url}} with your actual Webhook URL from Step 1.3.
If you’re using the blueprint, just replace the endpointUrl in the body section.
{
  "endpointUrl": "{{webhook url}}",
  "topics": ["order.create"]
}
2.3: Save and Run the Scenario
Save and run the scenario (no need to activate).
Check the results for the body response—you’ll want to copy the ID returned in this step, as we’ll need it in the next part.
If you’ve downloaded the blueprint, then the test will already send the notification.
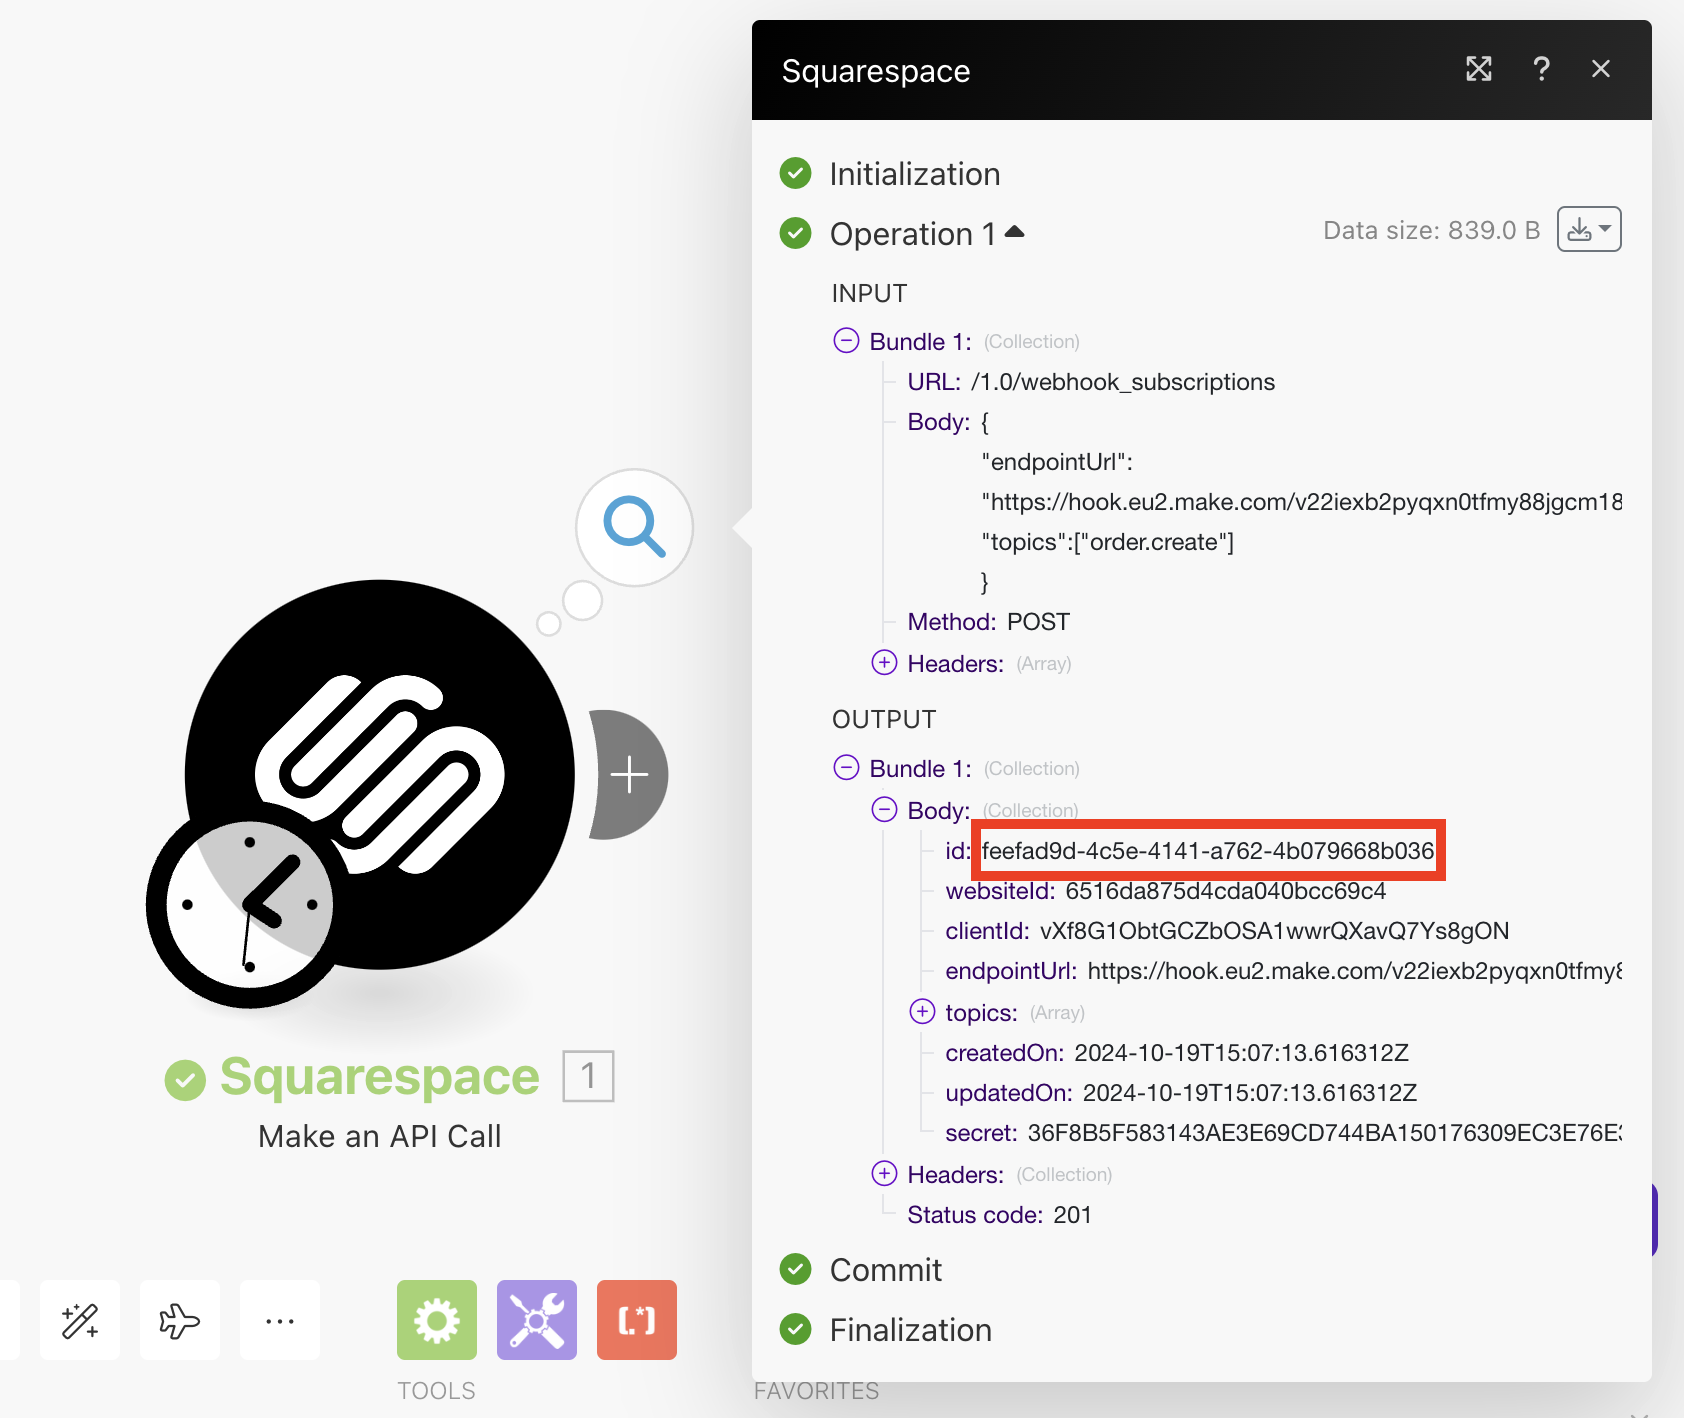
In the output, extend the Body and copy the id value.
Step 3: Send a Test Notification to Retrieve Data Structure
In a new tab, create another scenario to send a test notification. This allows you to get the necessary data structure for the webhook.
If you’re using the blueprint skip to step 3.4.
3.1: Add a Squarespace Module
Add another Squarespace module and select Make an API Call.
3.2: Set API Call Details
Set the API call details as follows:
{{id}} with the ID you copied from the previous step.
/1.0/webhook_subscriptions/{{id}}/actions/sendTestNotification

Replace {{id}} with the ID you copied from the previous step.
Method: POST
Headers: Add the same key-value pair as before:
key:Content-Typevalue:application/json
Body: Use the following code:
{
  "topic": "order.create"
}
3.3: Save and Run the Scenario
Save and run the scenario (no need to activate) to send the test notification.
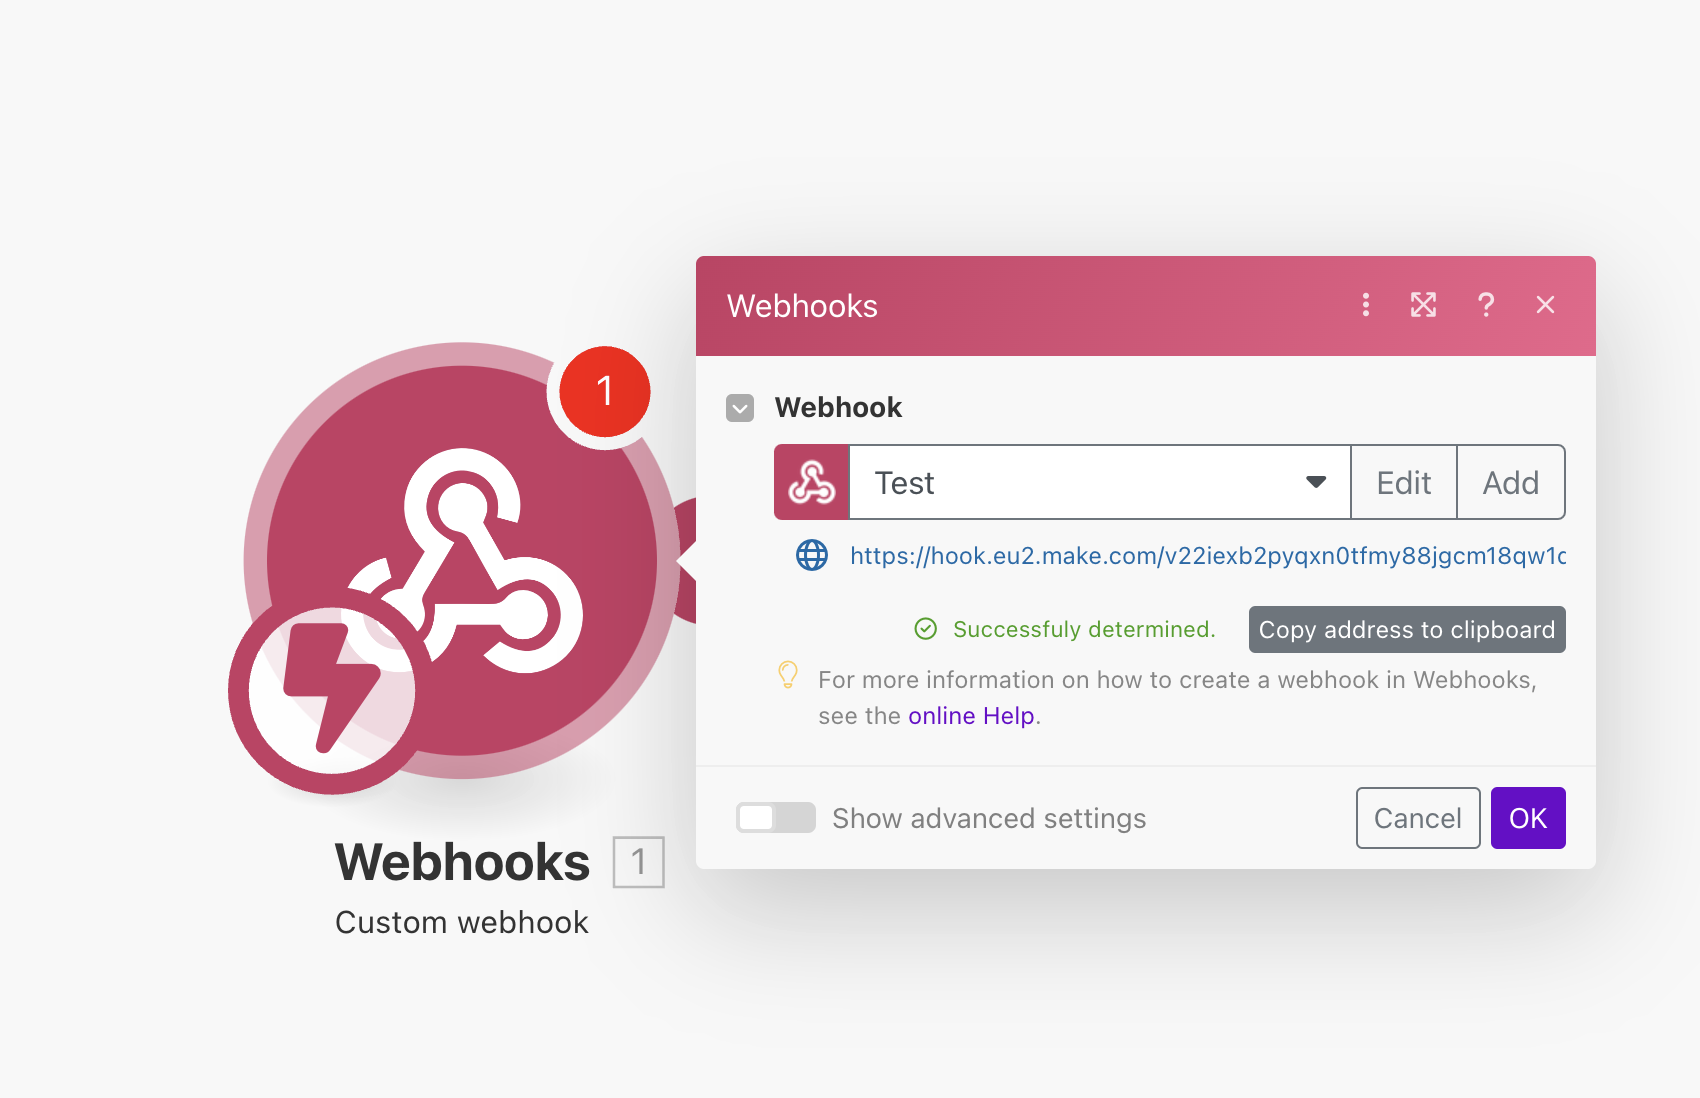
3.4: Check the Webhook Data
Return to the webhook scenario from Step 1. If you see a green checkmark with a message saying “Successfully determined”, it means the webhook is successfully receiving and recognizing order data.
Step 4: Retrieve Order Details
Now that your webhook is receiving data in real-time, it’s time to set up an action that retrieves detailed order information.
If you’re using the blueprint, this is already mapped for you.
4.1: Add a Squarespace Module
Add another Squarespace module to the original webhook scenario and connect it to the webhook module.
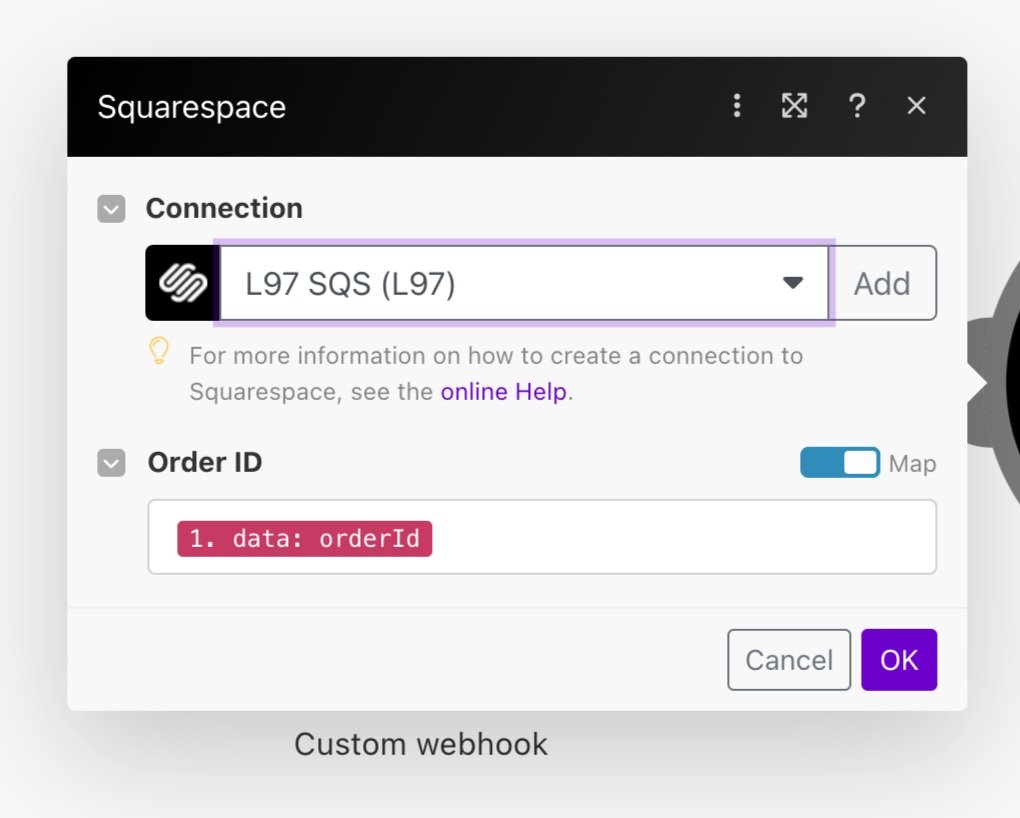
Select Get Order from the list of options.
4.2: Map Order ID to Webhook Data
In the Order ID field, map the data to the orderId field that came in through the webhook.
Step 5: Create Custom Automations
Now that your webhook is fully functional and retrieves order details, you can create a custom automation for each order event. For example:
Send order details to Google Sheets
Notify your team via Slack or email
Trigger fulfilment processes based on the order data
Final Thoughts
By using the webhook subscription method, you ensure that your automations trigger the moment an order is placed without relying on intervals. This helps save operations and keeps your automation workflow real-time and efficient.
FAQS
What is a webhook, and why is it better than using intervals?
A webhook is a way for one app to send data to another as soon as an event happens—in this case, when a Squarespace order is placed. Unlike intervals, which run at scheduled times (e.g., every minute or hour), a webhook triggers instantly, making automations happen in real-time without consuming unnecessary operations.
How does subscribing to a Squarespace webhook save operations?
By subscribing to a Squarespace webhook, the automation triggers only when an order is placed, as opposed to running the scenario multiple times per day. This saves operations and reduces your overall cost on Make.com, especially if you have frequent orders.
What happens if my scenario is set on intervals instead of using a webhook?
If your scenario is set on intervals, it will execute based on your chosen time frame (e.g., every minute or every hour). This means it will use operations even if no order has been placed, which can quickly consume your quota. Using a webhook ensures that the automation runs only when necessary. Also, if you’re automation requires instant workflows (ie. transactional email, newsletter subscription, etc.), the scenario will only trigger on the chosen time frame, potentially delaying the workflow.
How do I import the blueprints into my make scenario?
After you’ve downloaded the files:
Create a new scenario
Navigate to the Controls buttons (at the bottom of the window next to Scheduling)
Click the 3 dots (more) and select import blueprints.
Can I use this setup for other events on Squarespace, like form submissions?
This tutorial only covers ecommerce events.
What are some examples of automations I can set up using this webhook system?
You can create a variety of automations, such as:
Sending an email notification when an order is placed.
Adding new order details to Google Sheets.
Notifying your fulfillment team via Slack or email.
Triggering shipment tracking updates automatically.
Connect another app in your tech stack to perform other functions.
Do I need coding experience to implement this solution?
No, the tutorial guides you step by step, and you don’t need to write any code. However, some basic familiarity with APIs and automation platforms like Make.com will be helpful.
How do I test if the webhook is working correctly?
You can send a test notification from Squarespace to the webhook using the sendTestNotification API call. If your webhook scenario shows a “Successfully determined” message in Make.com, the setup is working correctly.